BoT-SORT实战:手把手教你实现BoT-SORT训练和测试
文章目录
摘要
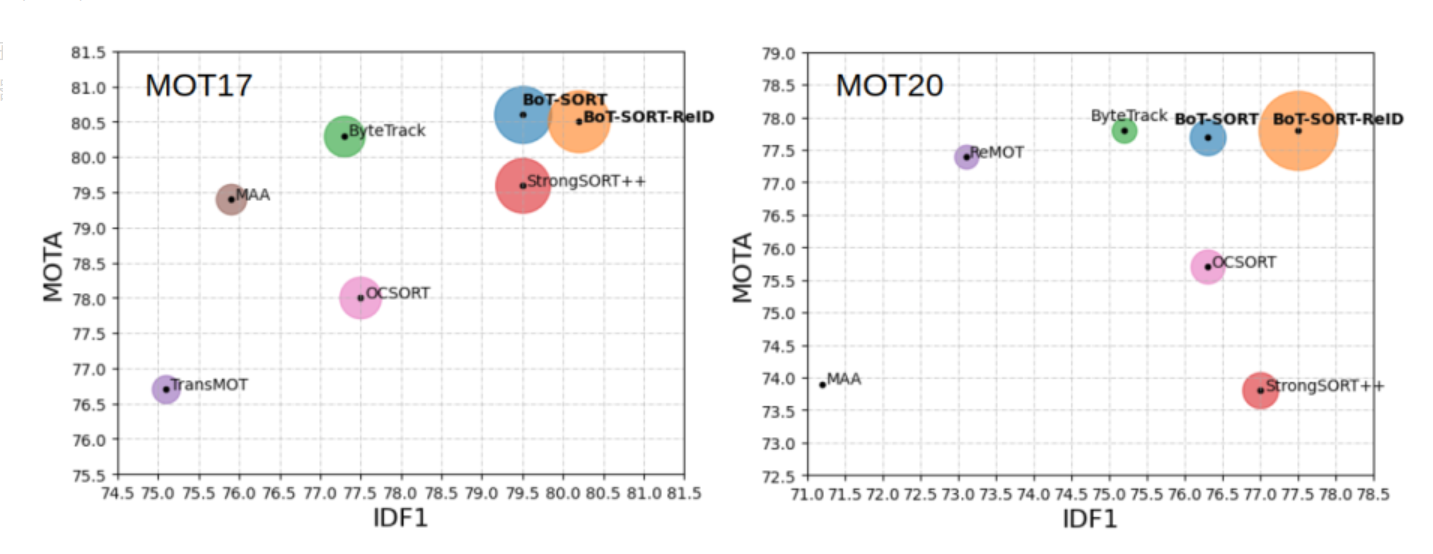
BoT-SORT是今年非常游戏的跟踪器模型。就所有主要 MOT 指标MOTA、IDF1 和 HOTA而言,BoT-SORT 和 BoT-SORT-ReID 在 MOT17 和 MOT20 测试集的 MOTChallenge数据集中排名第一。对于 MOT17:实现了 80.5 MOTA、80.2 IDF1 和 65.0 HOTA,在跟踪器的排行榜上暂居第一。
论文翻译:https://blog.csdn.net/hhhhhhhhhhwwwwwwwwww/article/details/126890651
论文链接:https://arxiv.org/pdf/2206.14651.pdf
代码:https://github.com/NirAharon/BOT-SORT
这篇文章主要讲述如何实现BoT-SORT训练和测试。
1、数据准备
数据,我们使用MOT17和MOT20这两款数据集。下载地址:
官方网站:https://motchallenge.net/
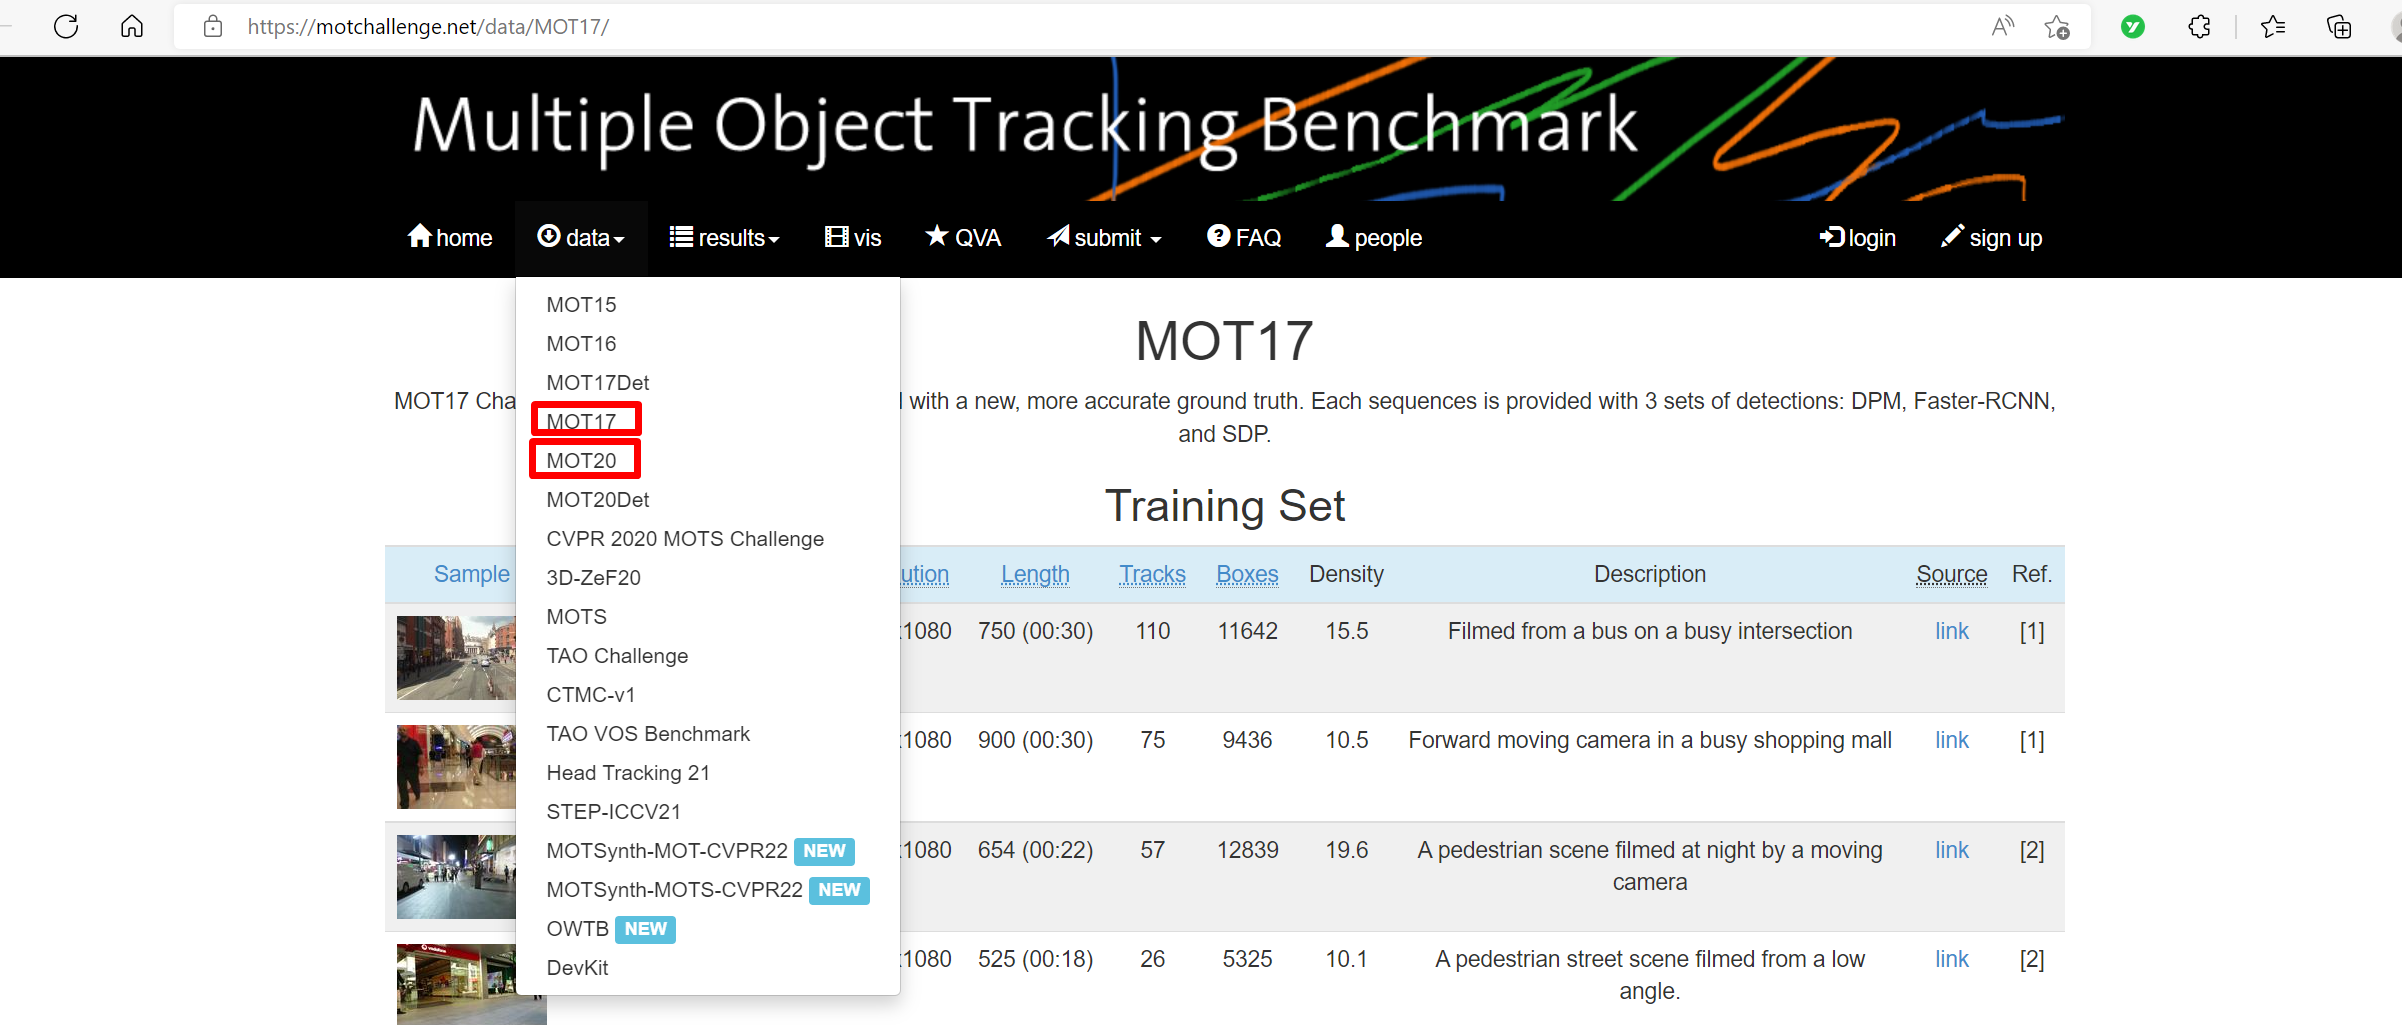
然后,点击“data”,就可以看到MOT17和MOT20。
选择MOT17,然后就可以看到MOT17的网页。
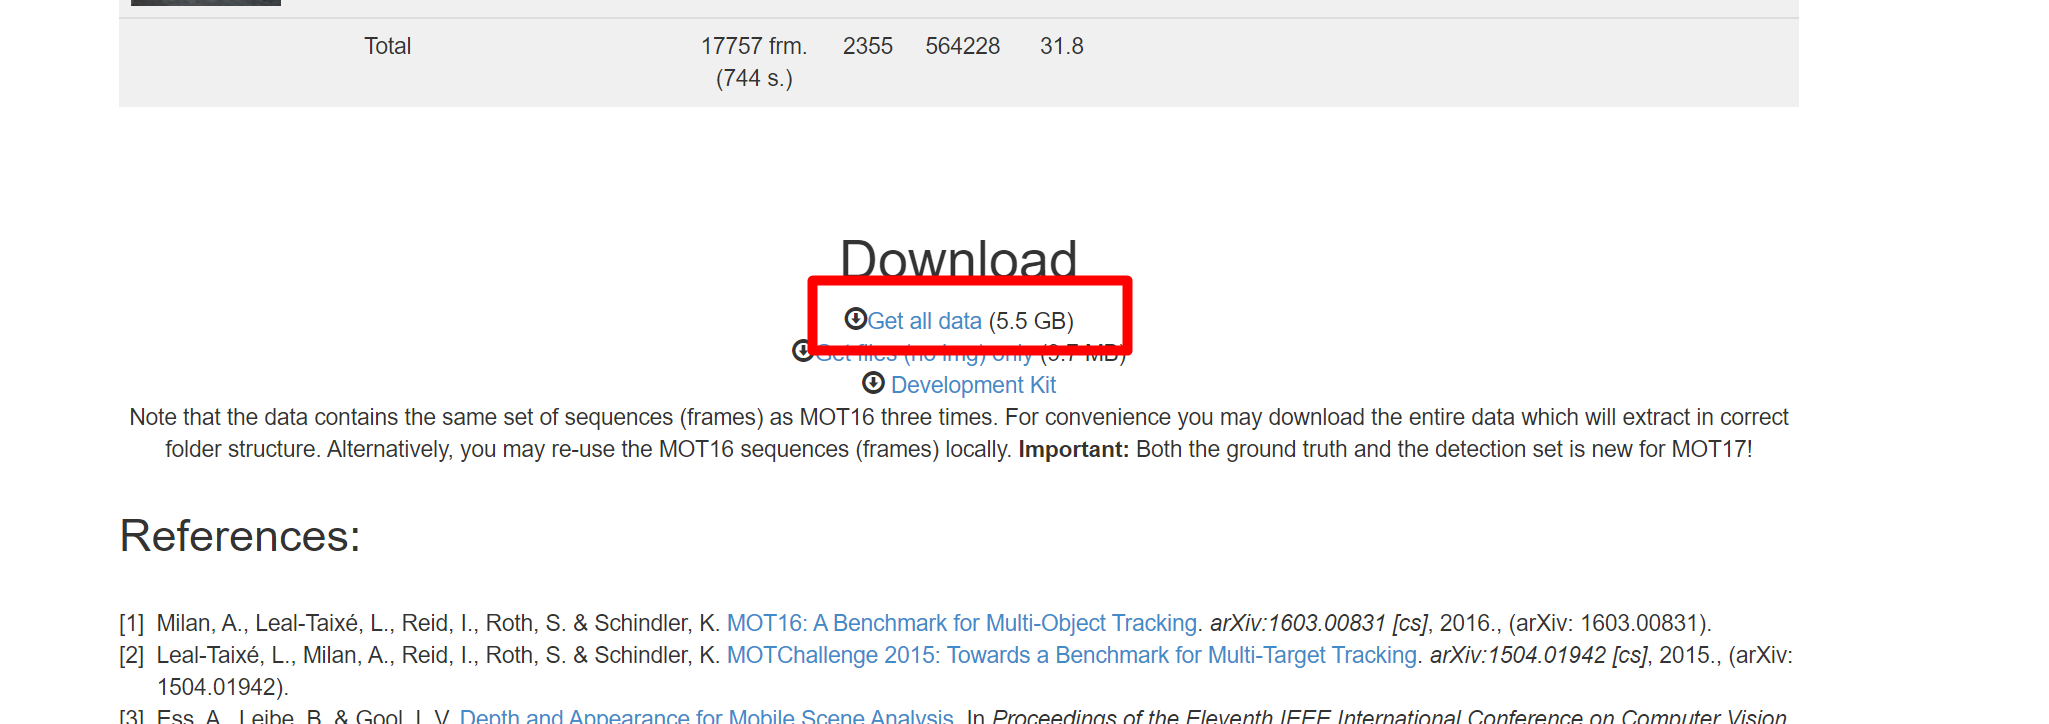
将网页下拉到最后就可以看到下载链接了。点击“Get all data”,下载MOT17。
同理,选择MOT20下载MOT20数据集。
2、配置BoT-SORT环境
2.1、获取代码
链接:
https://github.com/NirAharon/BOT-SORT
将其下载下来。然后放到本地磁盘,解压。
2.2、创建虚拟环境
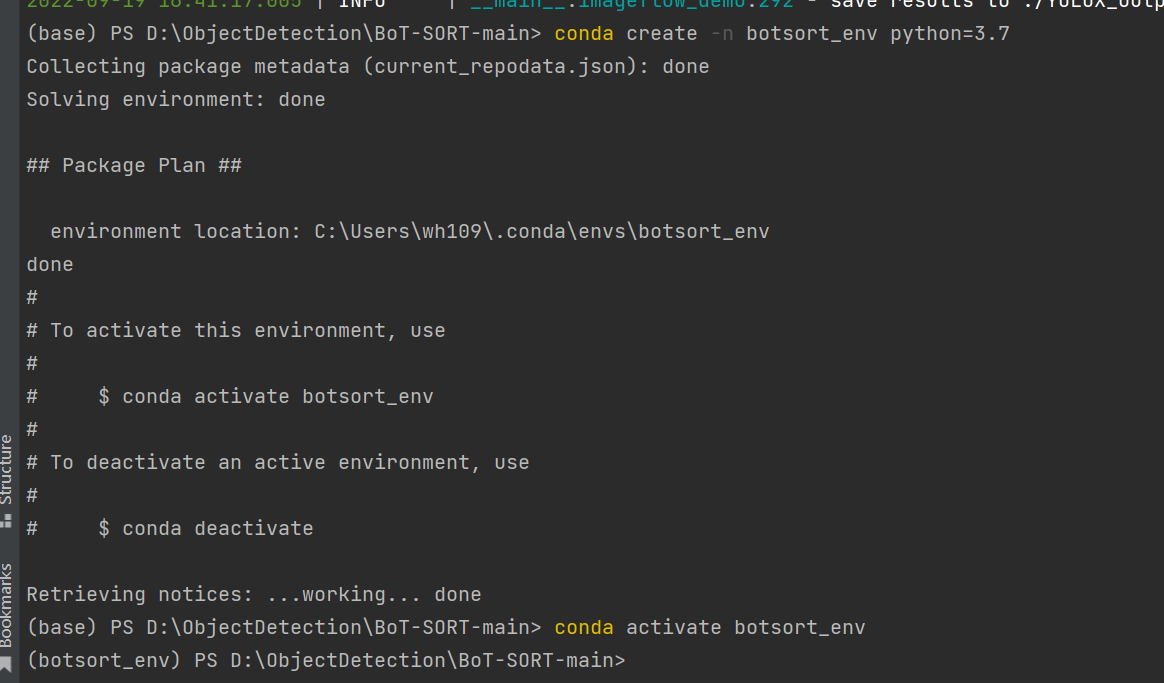
执行如下命令:
conda create -n botsort_env python=3.7
conda activate botsort_env
2.3、安装必要的包
第一种,进入BoT-SORT-main目录
执行
pip install -r requirements.txt
安装requirements.txt所有的包,这样会安装多余的包。我通常采用另一种方式:单独安装每个包。
2.3.1、安装pytorch

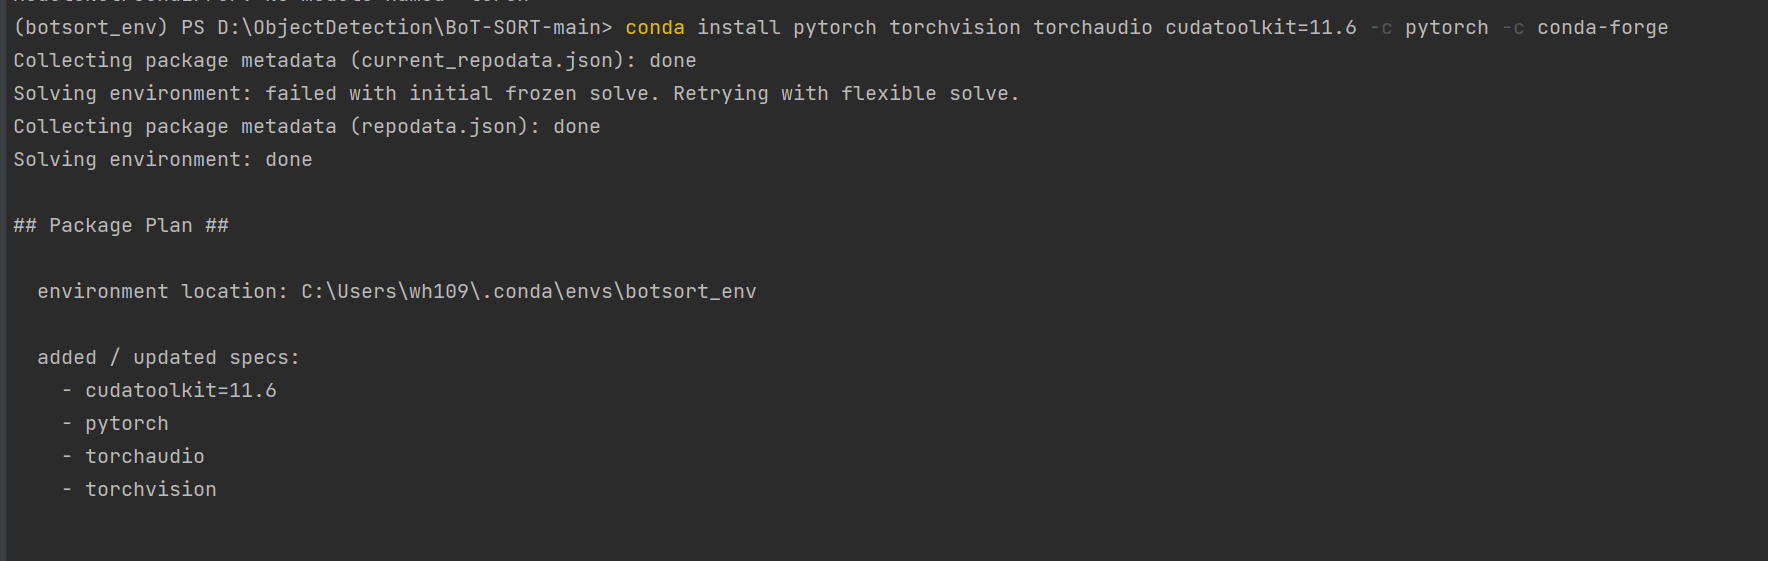
执行命令:
conda install pytorch torchvision torchaudio cudatoolkit=11.6 -c pytorch -c conda-forge
2.3.2、安装cython
pip install cython
2.3.3、安装Cython-bbox
这里主要讲如何在Window下面安装:
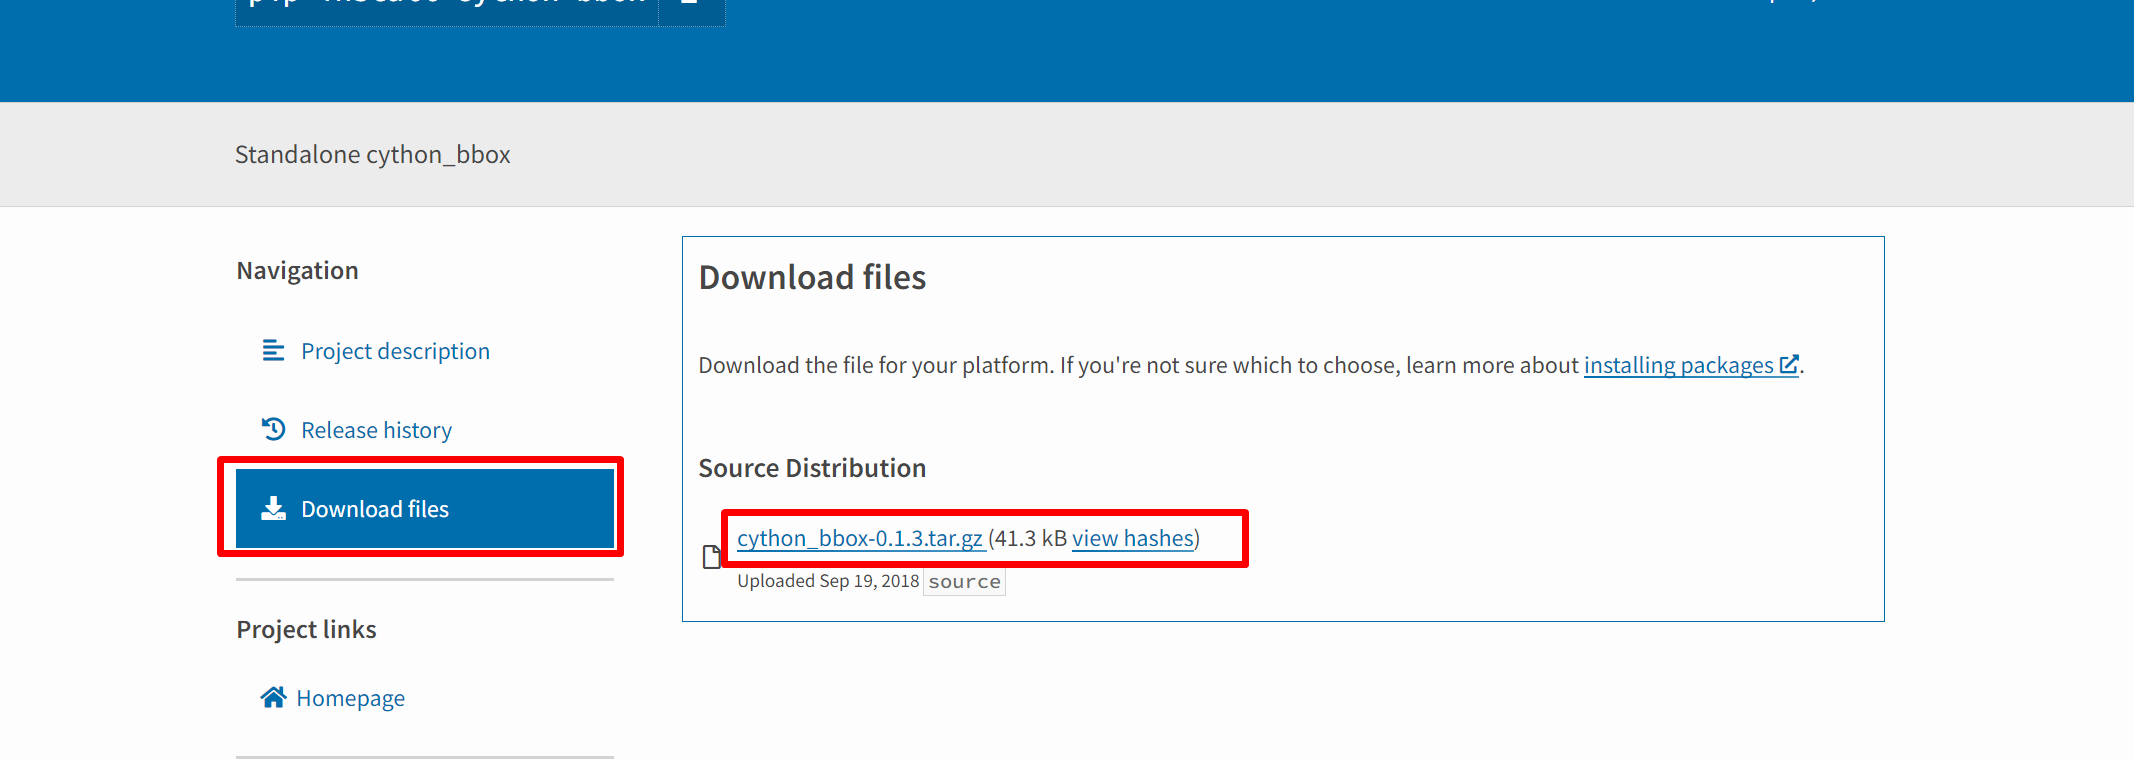
第一步:从网址https://pypi.org/project/cython-bbox/中下载cython-bbox,然后解压,可以看到dist文件夹。
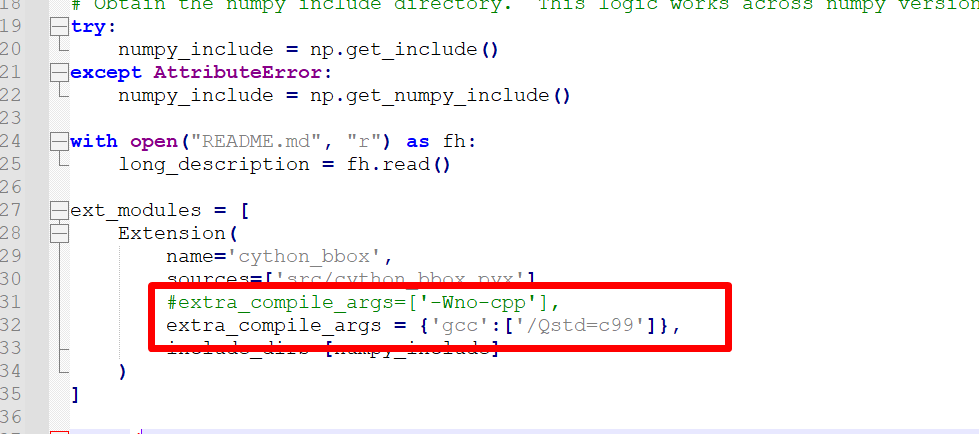
第二步:解压后,在文件夹里找到setup.py,并把extra_compile_args=[’-Wno-cpp’],修改为 extra_compile_args = {‘gcc’: [‘/Qstd=c99’]},如下图所示:
extra_compile_args = {'gcc':['/Qstd=c99']},
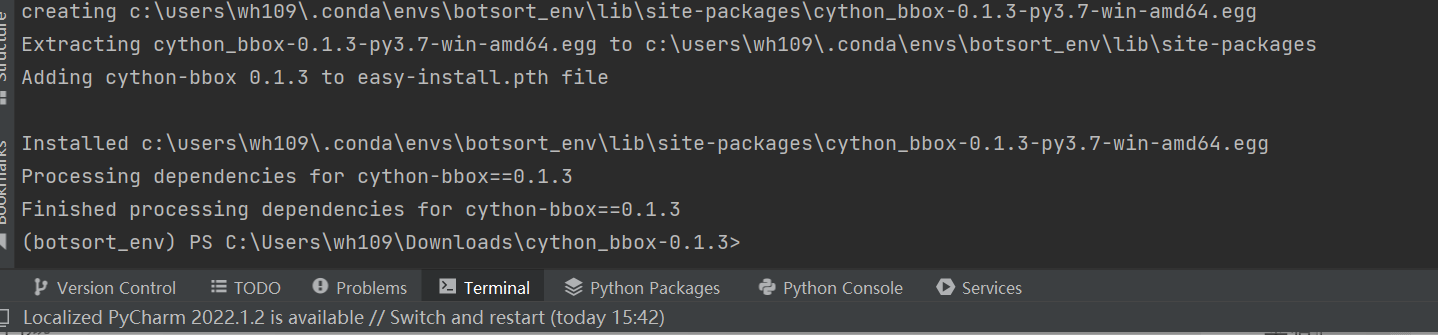
最后一步:在虚拟环境下,切换到cython_bbox-0.1.3缩在文件夹,输入命令:python setup.py build_ext install,当出现下图所示的结果,则代表cython-bbox安装成功。
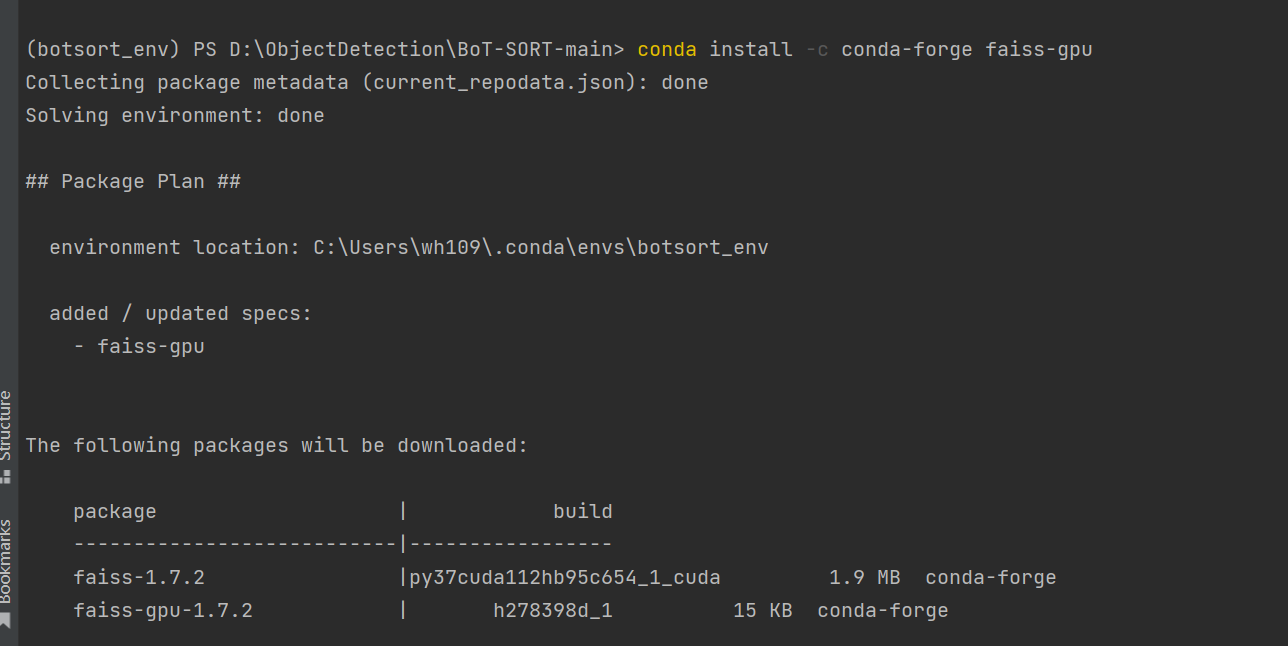
2.3.4、安装faiss
参考:https://github.com/facebookresearch/faiss/blob/main/INSTALL.md
conda install -c conda-forge faiss-gpu
2.3.5、安装其他的包
pip install loguru
pip install thop
pip install tabulate
pip install six
pip install yacs
pip install termcolor
pip install tensorboard
pip install pycocotools
pip install lap
把上面的安装包正确安装后就可以开始测试了。
3、训练
3.1、生成REID数据集
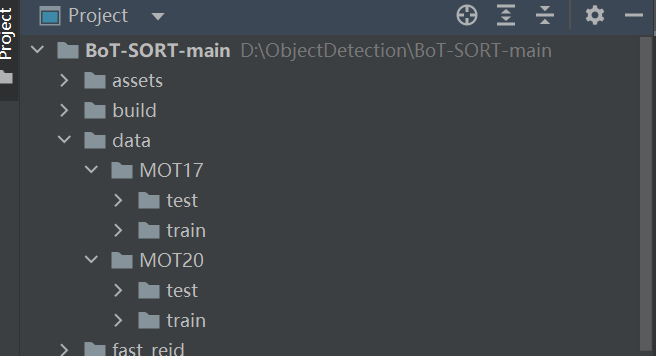
将下载好的数据集解压,放到data目录下,如下图:
执行命令:
# For MOT17
python fast_reid/datasets/generate_mot_patches.py --data_path <dataets_dir> --mot 17
# For MOT20
python fast_reid/datasets/generate_mot_patches.py --data_path <dataets_dir> --mot 20
例如:
# For MOT20
python fast_reid/datasets/generate_mot_patches.py --data_path data --mot 17
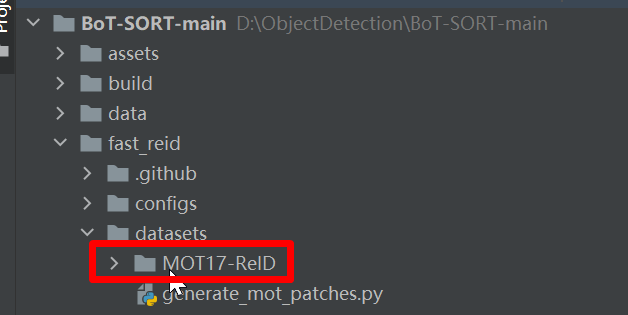
等待完成后,就可以在“fast_reid/datasets”下面找到数据集,如下图:
3.2、预训练模型
3.2.1、ByteTrack预训练模型
- Standard models
| Model | MOTA | IDF1 | IDs | FPS |
|---|---|---|---|---|
| bytetrack_x_mot17 [google], [baidu(code:ic0i)] | 90.0 | 83.3 | 422 | 29.6 |
| bytetrack_l_mot17 [google], [baidu(code:1cml)] | 88.7 | 80.7 | 460 | 43.7 |
| bytetrack_m_mot17 [google], [baidu(code:u3m4)] | 87.0 | 80.1 | 477 | 54.1 |
| bytetrack_s_mot17 [google], [baidu(code:qflm)] | 79.2 | 74.3 | 533 | 64.5 |
- Light models
| Model | MOTA | IDF1 | IDs | Params(M) | FLOPs(G) |
|---|---|---|---|---|---|
| bytetrack_nano_mot17 [google], [baidu(code:1ub8)] | 69.0 | 66.3 | 531 | 0.90 | 3.99 |
| bytetrack_tiny_mot17 [google], [baidu(code:cr8i)] | 77.1 | 71.5 | 519 | 5.03 | 24.45 |
3.2.2、REID预训练模型
MOT17-SBS-S50网盘链接:
https://drive.google.com/file/d/1QZFWpoa80rqo7O-HXmlss8J8CnS7IUsN/view?usp=sharing
或者下载我上传到CSDN的模型:
https://download.csdn.net/download/hhhhhhhhhhwwwwwwwwww/86566078
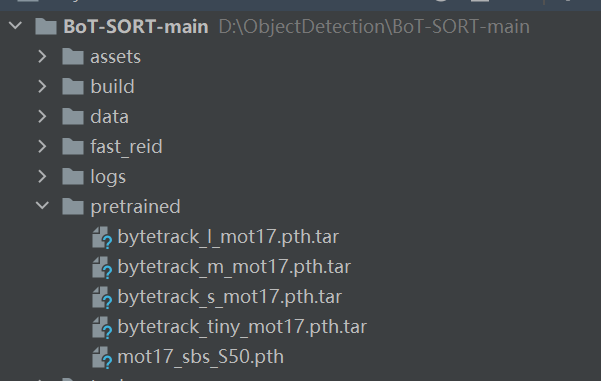
将预训练模型统一放到pretrained文件夹
3.3、开始训练
修改配置文件Base-SBS.yml里面的参数,根据自己的显卡大小调整BatchSize和学习率。

然后执行如下命令开始训练。
# For training MOT17
python fast_reid/tools/train_net.py --config-file ./fast_reid/configs/MOT17/sbs_S50.yml MODEL.DEVICE "cuda:0"

# For training MOT20
python fast_reid/tools/train_net.py --config-file ./fast_reid/configs/MOT20/sbs_S50.yml MODEL.DEVICE "cuda:0"
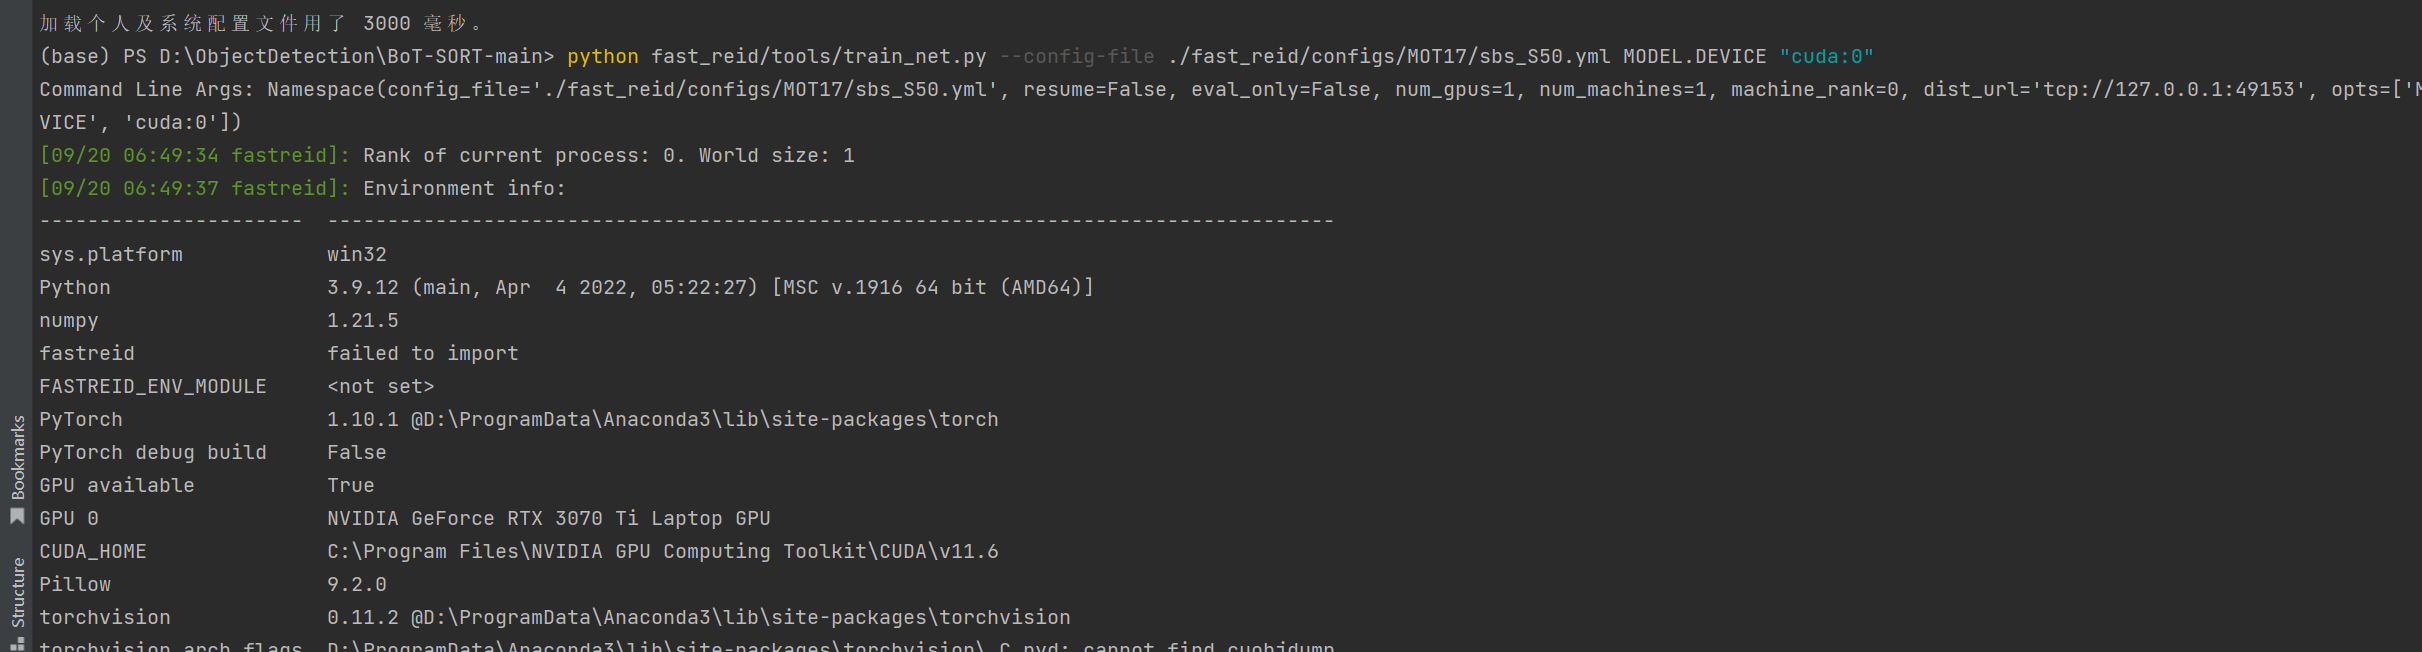
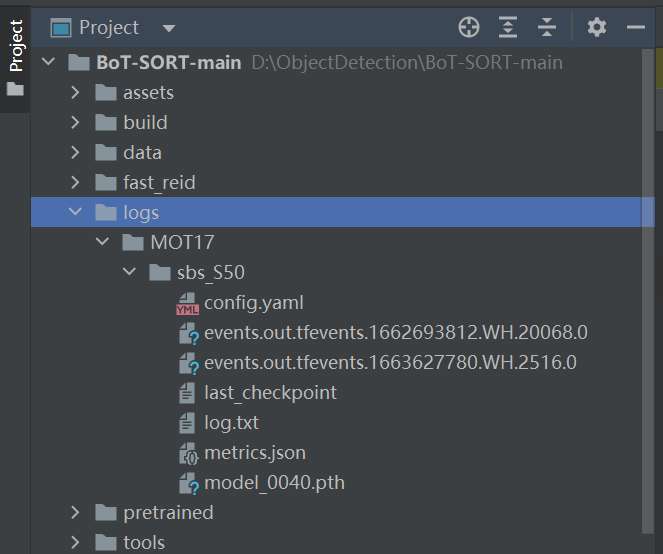
看到如下画面就表示开始训练了。在logs文件夹下面可以看到训练好的模型。
4、如何更改FASTREID的BackBone?
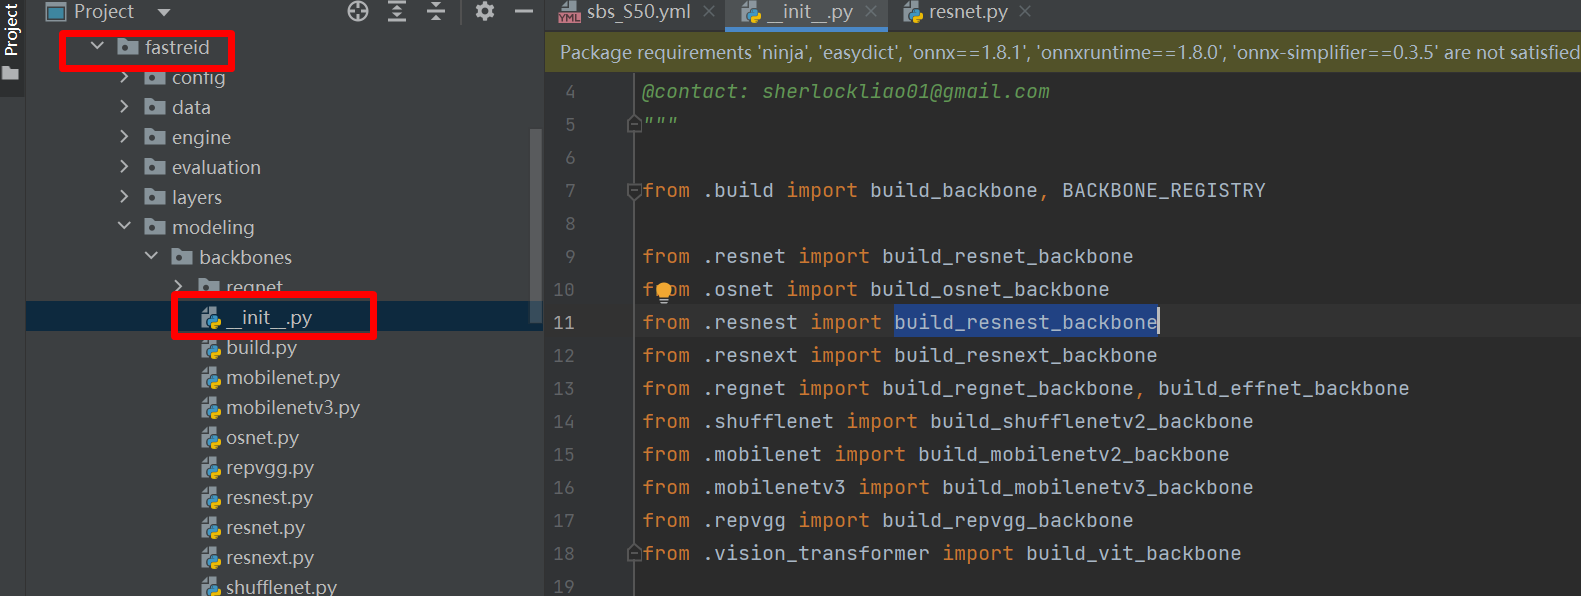
按照上图打开init.py可以看到fastreid支持的backbone。下面我们开始修改backbone,比如我们想改一个小一点的resnet18。
首先,将backbone的那么修改为build_resnet_backbone,
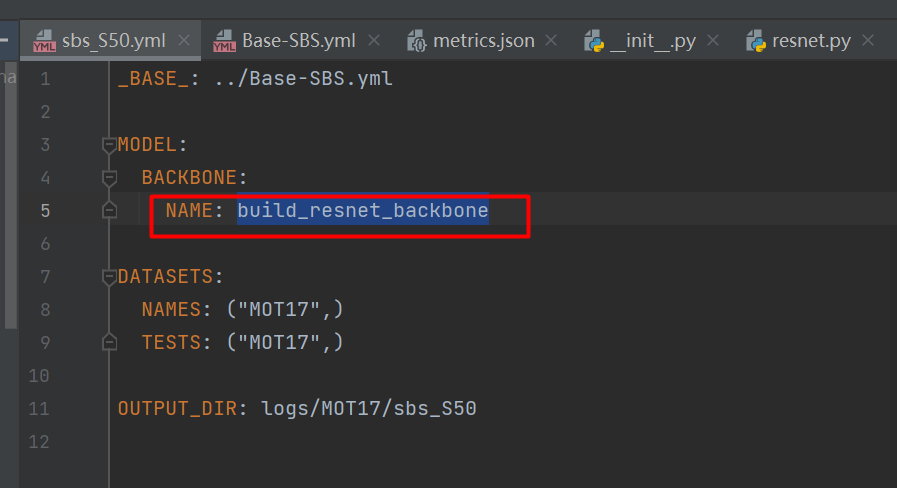
然后,再添加DEPTH字段,将DEPTH字段的值设置为18x,这个值可以在fastreid->modeling->backbones->resnet.py中找到。

5、测试
打开tools/track.py文件,修改里面的参数,需要修改的参数。
parser.add_argument("--fast-reid-config", dest="fast_reid_config", default=r"fast_reid/configs/MOT17/sbs_S50.yml", type=str, help="reid config file path")
parser.add_argument("--fast-reid-weights", dest="fast_reid_weights", default=r"pretrained/mot17_sbs_S50.pth", type=str, help="reid config file path")
将这两个参数按照本地的实际参数修改。
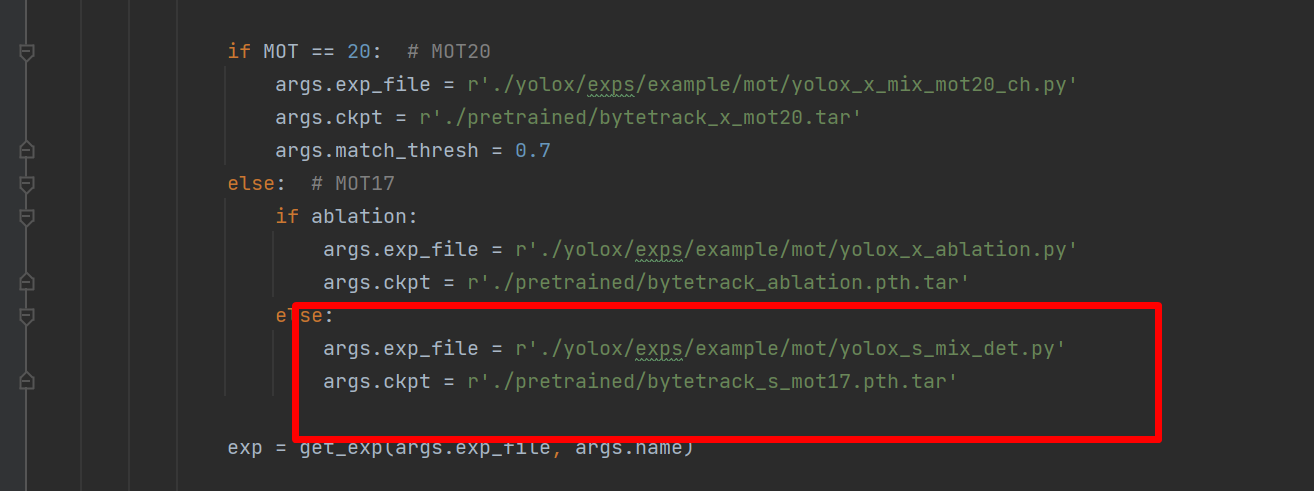
跟踪模型默认是byteTrack的bytetrack_x_mot17.pth.tar文件,我们可以根据任务调整。
- Test on MOT17
cd <BoT-SORT_dir>
python tools/track.py <dataets_dir/MOT17> --default-parameters --with-reid --benchmark "MOT17" --eval "test" --fp16 --fuse
python tools/interpolation.py --txt_path <path_to_track_result>
- Test on MOT20
cd <BoT-SORT_dir>
python tools/track.py <dataets_dir/MOT20> --default-parameters --with-reid --benchmark "MOT20" --eval "test" --fp16 --fuse
python tools/interpolation.py --txt_path <path_to_track_result>
例如:
python tools/track.py data/MOT17 --default-parameters --with-reid --benchmark "MOT17" --eval "test" --fp16 --fuse
等待测试完成。
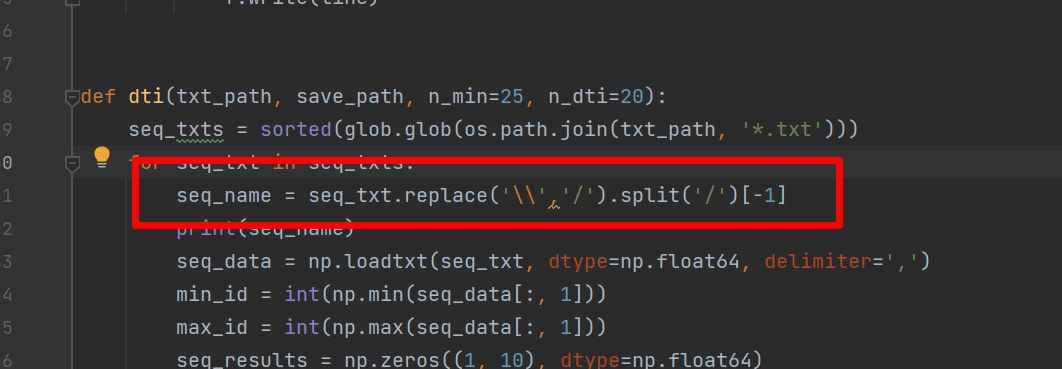
然后修改interpolation.py,如下图的位置:
然后执行命令:
python tools/interpolation.py --txt_path ./YOLOX_outputs/yolox_s_mix_det/track_results/
5.1、测试视频
python tools/demo.py video --path <path_to_video> -f yolox/exps/example/mot/yolox_x_mix_det.py -c pretrained/bytetrack_x_mot17.pth.tar --with-reid --fuse-score --fp16 --fuse --save_result
例如:
python tools/demo.py video --path 1.mp4 -f yolox/exps/example/mot/yolox_x_mix_det.py -c pretrained/bytetrack_x_mot17.pth.tar --with-reid --fuse-score --fp16 --fuse --save_result
5.2、测试摄像头
python tools/demo.py webcam -f yolox/exps/example/mot/yolox_x_mix_det.py -c pretrained/bytetrack_x_mot17.pth.tar --with-reid --fuse-score --fp16 --fuse --save_result
5.3、多类别测试
多类别是基于yolov7做的,使用yolov7检测出物体的box,然后输入到bot做跟踪。
python tools/mc_demo_yolov7.py --weights pretrained/yolov7-w6.pt --source 3.mp4 --fuse-score --agnostic-nms --with-reid --view-img
mc_demo_yolov7.py的代码:
import argparse
import time
from pathlib import Path
import sys

import cv2
import torch
import torch.backends.cudnn as cudnn
from numpy import random

from yolov7.models.experimental import attempt_load
from yolov7.utils.datasets import LoadStreams, LoadImages
from yolov7.utils.general import check_img_size, check_requirements, check_imshow, non_max_suppression, \
    apply_classifier, \
    scale_coords, xyxy2xywh, strip_optimizer, set_logging, increment_path
from yolov7.utils.plots import plot_one_box
from yolov7.utils.torch_utils import select_device, load_classifier, time_synchronized, TracedModel

from tracker.mc_bot_sort import BoTSORT
from tracker.tracking_utils.timer import Timer

sys.path.insert(0, './yolov7')
sys.path.append('.')

def write_results(filename, results):
    save_format = '{frame},{id},{x1},{y1},{w},{h},{s},-1,-1,-1\n'
    with open(filename, 'w') as f:
        for frame_id, tlwhs, track_ids, scores in results:
            for tlwh, track_id, score in zip(tlwhs, track_ids, scores):
                if track_id < 0:
                    continue
                x1, y1, w, h = tlwh
                line = save_format.format(frame=frame_id, id=track_id, x1=round(x1, 1), y1=round(y1, 1), w=round(w, 1),
                                          h=round(h, 1), s=round(score, 2))
                f.write(line)
    print('save results to {}'.format(filename))


def detect(save_img=False):
    source, weights, view_img, save_txt, imgsz, trace = opt.source, opt.weights, opt.view_img, opt.save_txt, opt.img_size, opt.trace
    save_img = not opt.nosave and not source.endswith('.txt')  # save inference images
    webcam = source.isnumeric() or source.endswith('.txt') or source.lower().startswith(
        ('rtsp://', 'rtmp://', 'http://', 'https://'))

    # Directories
    save_dir = Path(increment_path(Path(opt.project) / opt.name, exist_ok=opt.exist_ok))  # increment run
    (save_dir / 'labels' if save_txt else save_dir).mkdir(parents=True, exist_ok=True)  # make dir

    # Initialize
    set_logging()
    device = select_device(opt.device)
    half = device.type != 'cpu'  # half precision only supported on CUDA

    # Load model
    model = attempt_load(weights, map_location=device)  # load FP32 model
    stride = int(model.stride.max())  # model stride
    imgsz = check_img_size(imgsz, s=stride)  # check img_size

    if trace:
        model = TracedModel(model, device, opt.img_size)

    if half:
        model.half()  # to FP16

    # Second-stage classifier
    classify = False
    if classify:
        modelc = load_classifier(name='resnet101', n=2)  # initialize
        modelc.load_state_dict(torch.load('weights/resnet101.pt', map_location=device)['model']).to(device).eval()

    # Set Dataloader
    vid_path, vid_writer = None, None
    if webcam:
        view_img = check_imshow()
        cudnn.benchmark = True  # set True to speed up constant image size inference
        dataset = LoadStreams(source, img_size=imgsz, stride=stride)
    else:
        dataset = LoadImages(source, img_size=imgsz, stride=stride)

    # Get names and colors
    names = model.module.names if hasattr(model, 'module') else model.names
    colors = [[random.randint(0, 255) for _ in range(3)] for _ in range(100)]

    # Create tracker
    tracker = BoTSORT(opt, frame_rate=30.0)

    # Run inference
    if device.type != 'cpu':
        model(torch.zeros(1, 3, imgsz, imgsz).to(device).type_as(next(model.parameters())))  # run once
    t0 = time.time()
    for path, img, im0s, vid_cap in dataset:
        img = torch.from_numpy(img).to(device)
        img = img.half() if half else img.float()  # uint8 to fp16/32
        img /= 255.0  # 0 - 255 to 0.0 - 1.0
        if img.ndimension() == 3:
            img = img.unsqueeze(0)

        # Inference
        t1 = time_synchronized()
        pred = model(img, augment=opt.augment)[0]

        # Apply NMS
        pred = non_max_suppression(pred, opt.conf_thres, opt.iou_thres, classes=opt.classes, agnostic=opt.agnostic_nms)
        t2 = time_synchronized()

        # Apply Classifier
        if classify:
            pred = apply_classifier(pred, modelc, img, im0s)

        # Process detections
        results = []

        for i, det in enumerate(pred):  # detections per image
            if webcam:  # batch_size >= 1
                p, s, im0, frame = path[i], '%g: ' % i, im0s[i].copy(), dataset.count
            else:
                p, s, im0, frame = path, '', im0s, getattr(dataset, 'frame', 0)

            # Run tracker
            detections = []
            if len(det):
                boxes = scale_coords(img.shape[2:], det[:, :4], im0.shape)
                boxes = boxes.cpu().numpy()
                detections = det.cpu().numpy()
                detections[:, :4] = boxes

            online_targets = tracker.update(detections, im0)

            online_tlwhs = []
            online_ids = []
            online_scores = []
            online_cls = []
            for t in online_targets:
                tlwh = t.tlwh
                tlbr = t.tlbr
                tid = t.track_id
                tcls = t.cls
                if tlwh[2] * tlwh[3] > opt.min_box_area:
                    online_tlwhs.append(tlwh)
                    online_ids.append(tid)
                    online_scores.append(t.score)
                    online_cls.append(t.cls)

                    # save results
                    results.append(
                        f"{i + 1},{tid},{tlwh[0]:.2f},{tlwh[1]:.2f},{tlwh[2]:.2f},{tlwh[3]:.2f},{t.score:.2f},-1,-1,-1\n"
                    )

                    if save_img or view_img:  # Add bbox to image
                        if opt.hide_labels_name:
                            label = f'{tid}, {int(tcls)}'
                        else:
                            label = f'{tid}, {names[int(tcls)]}'
                        plot_one_box(tlbr, im0, label=label, color=colors[int(tid) % len(colors)], line_thickness=2)
            p = Path(p)  # to Path
            save_path = str(save_dir / p.name)  # img.jpg

            # Print time (inference + NMS)
            # print(f'{s}Done. ({t2 - t1:.3f}s)')

            # Stream results
            if view_img:
                cv2.imshow('BoT-SORT', im0)
                cv2.waitKey(1)  # 1 millisecond

            # Save results (image with detections)
            if save_img:
                if dataset.mode == 'image':
                    cv2.imwrite(save_path, im0)
                else:  # 'video' or 'stream'
                    if vid_path != save_path:  # new video
                        vid_path = save_path
                        if isinstance(vid_writer, cv2.VideoWriter):
                            vid_writer.release()  # release previous video writer
                        if vid_cap:  # video
                            fps = vid_cap.get(cv2.CAP_PROP_FPS)
                            w = int(vid_cap.get(cv2.CAP_PROP_FRAME_WIDTH))
                            h = int(vid_cap.get(cv2.CAP_PROP_FRAME_HEIGHT))
                        else:  # stream
                            fps, w, h = 30, im0.shape[1], im0.shape[0]
                            save_path += '.mp4'
                        vid_writer = cv2.VideoWriter(save_path, cv2.VideoWriter_fourcc(*'mp4v'), fps, (w, h))
                    vid_writer.write(im0)

    if save_txt or save_img:
        s = f"\n{len(list(save_dir.glob('labels/*.txt')))} labels saved to {save_dir / 'labels'}" if save_txt else ''
        # print(f"Results saved to {save_dir}{s}")

    print(f'Done. ({time.time() - t0:.3f}s)')


if __name__ == '__main__':
    parser = argparse.ArgumentParser()
    parser.add_argument('--weights', nargs='+', type=str, default='yolov7.pt', help='model.pt path(s)')
    parser.add_argument('--source', type=str, default='inference/images', help='source')  # file/folder, 0 for webcam
    parser.add_argument('--img-size', type=int, default=1920, help='inference size (pixels)')
    parser.add_argument('--conf-thres', type=float, default=0.09, help='object confidence threshold')
    parser.add_argument('--iou-thres', type=float, default=0.7, help='IOU threshold for NMS')
    parser.add_argument('--device', default='', help='cuda device, i.e. 0 or 0,1,2,3 or cpu')
    parser.add_argument('--view-img', action='store_true', help='display results')
    parser.add_argument('--save-txt', action='store_true', help='save results to *.txt')
    parser.add_argument('--save-conf', action='store_true', help='save confidences in --save-txt labels')
    parser.add_argument('--nosave', action='store_true', help='do not save images/videos')
    parser.add_argument('--classes', nargs='+', type=int, help='filter by class: --class 0, or --class 0 2 3')
    parser.add_argument('--agnostic-nms', action='store_true', help='class-agnostic NMS')
    parser.add_argument('--augment', action='store_true', help='augmented inference')
    parser.add_argument('--update', action='store_true', help='update all models')
    parser.add_argument('--project', default='runs/detect', help='save results to project/name')
    parser.add_argument('--name', default='exp', help='save results to project/name')
    parser.add_argument('--exist-ok', action='store_true', help='existing project/name ok, do not increment')
    parser.add_argument('--trace', action='store_true', help='trace model')
    parser.add_argument('--hide-labels-name', default=False, action='store_true', help='hide labels')

    # tracking args
    parser.add_argument("--track_high_thresh", type=float, default=0.3, help="tracking confidence threshold")
    parser.add_argument("--track_low_thresh", default=0.05, type=float, help="lowest detection threshold")
    parser.add_argument("--new_track_thresh", default=0.4, type=float, help="new track thresh")
    parser.add_argument("--track_buffer", type=int, default=30, help="the frames for keep lost tracks")
    parser.add_argument("--match_thresh", type=float, default=0.7, help="matching threshold for tracking")
    parser.add_argument("--aspect_ratio_thresh", type=float, default=1.6,
                        help="threshold for filtering out boxes of which aspect ratio are above the given value.")
    parser.add_argument('--min_box_area', type=float, default=10, help='filter out tiny boxes')
    parser.add_argument("--fuse-score", dest="mot20", default=False, action="store_true",
                        help="fuse score and iou for association")

    # CMC
    parser.add_argument("--cmc-method", default="orb", type=str, help="cmc method: files (Vidstab GMC) | orb | ecc")

    # ReID
    parser.add_argument("--with-reid", dest="with_reid", default=False, action="store_true", help="with ReID module.")
    parser.add_argument("--fast-reid-config", dest="fast_reid_config", default=r"fast_reid/configs/MOT17/sbs_S50.yml",
                        type=str, help="reid config file path")
    parser.add_argument("--fast-reid-weights", dest="fast_reid_weights", default=r"pretrained/mot17_sbs_S50.pth",
                        type=str, help="reid config file path")
    parser.add_argument('--proximity_thresh', type=float, default=0.5,
                        help='threshold for rejecting low overlap reid matches')
    parser.add_argument('--appearance_thresh', type=float, default=0.25,
                        help='threshold for rejecting low appearance similarity reid matches')

    opt = parser.parse_args()

    opt.jde = False
    opt.ablation = False

    print(opt)
    # check_requirements(exclude=('pycocotools', 'thop'))

    with torch.no_grad():
        if opt.update:  # update all models (to fix SourceChangeWarning)
            for opt.weights in ['yolov7.pt']:
                detect()
                strip_optimizer(opt.weights)
        else:
            detect()
智能推荐
CSS3边框和圆角 学习打卡
课程介绍 1、CSS3圆角 2、CSS3盒阴影 3、CSS3边界图片 CSS3圆角 1、border-radius:一个最多可以指定四个border-*-radius属性的复合属性,为元素添加圆角边框 2、语法:border-radius:1-4 length|%/1-4 length|% 3、兼容:IE9+ firefox4+ chrome safari5+ opera CSS3指定每一个圆角 ...
(Java)反射的应用 - 取得类的结构
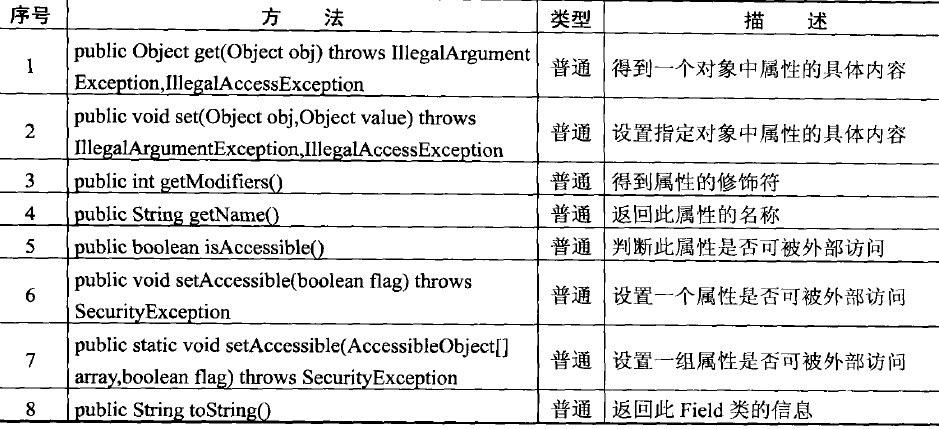
文章目录 一、基本概念 二、取得所实现的全部接口 三、取得父类 四、取得全部构造方法 五、取得全部方法 六、取得全部属性 一、基本概念 在反射机制中,还可以通过反射得到一个类的完整结构,这就需要使用 java.lang.reflect 包中的以下几个类: 这三个类都是 AccessibleObject 类的子类: 二、取得所实现的全部接口 要取得一个类所实现的全部接口,必须使用 Class 类中的...
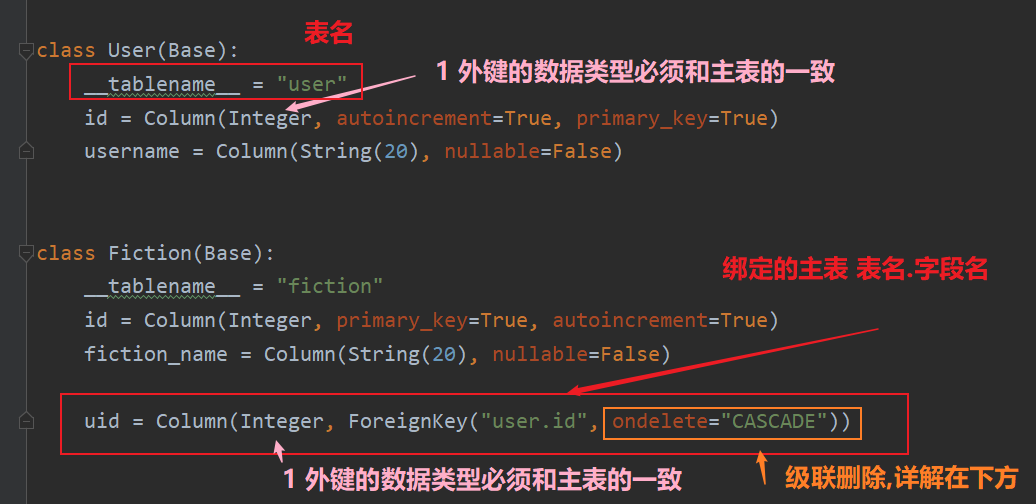
ORM-外键关联基本使用
外键 在Mysql中,外键可以让表之间关系变得更加紧密, 在SQlAlchemy中, 通过ForeignKey类来实现,并且可以指定表的外键约束 FroeignKey的导入 在从表中条件一个模型类.字段(属性)即可 外键关联的代码和示例图 图说明 外键约束的删除 如果删除了主表中的数据, 从表的数据会怎么样? 需要设置 "RESTRICT" : 主表数据被删除, 会阻止删除 &...


Linux操作心得(1)
Ubuntu 16.04 (1)今天遇到一个蜜汁尴尬的情况,一本书上的示例,要求我建一个文件夹及子文件夹,然而明明创建的文件却没有显示 按书上此时应该出现一个文件夹,但并没有: 但可以进入,作为小白看不懂,后来发现是因为/XX指的是将文件建立在根目录了,因此不管怎样,就算用ls,或ll命令都查不到的,此时正确方法应该是去掉/backup前的/,如图就解决了文件夹的创建过程,还有一种傻瓜式方法就是直...
猜你喜欢

如何写出优美的 JavaScript 代码?
作者:尹锋 链接:https://www.zhihu.com/question/20635785/answer/223515216 1,避免使用 js 糟粕和鸡肋 这些年来,随着 HTML5 和 Node.js 的发展,JavaScript 在各个领域遍地开花,已经从“世界上最被误解的语言”变成了“世界上最流行的语言”。但是由于历史原因,JavaSc...
07-zookeeper的watcher机制原理
zookeeper的watcher机制原理 Watcher 的基本流程 zookeeper的watcher机制,总的来说可以分为三个过程: 客户端注册Watcher。 服务器处理Watcher。 客户端回调Watcher。 客户端注册 watcher有3种方式,getData、exists、getChildren。以如下代码为例,来分析整个触发机制的原理 基于zkclient客户端发起一个数据操作...
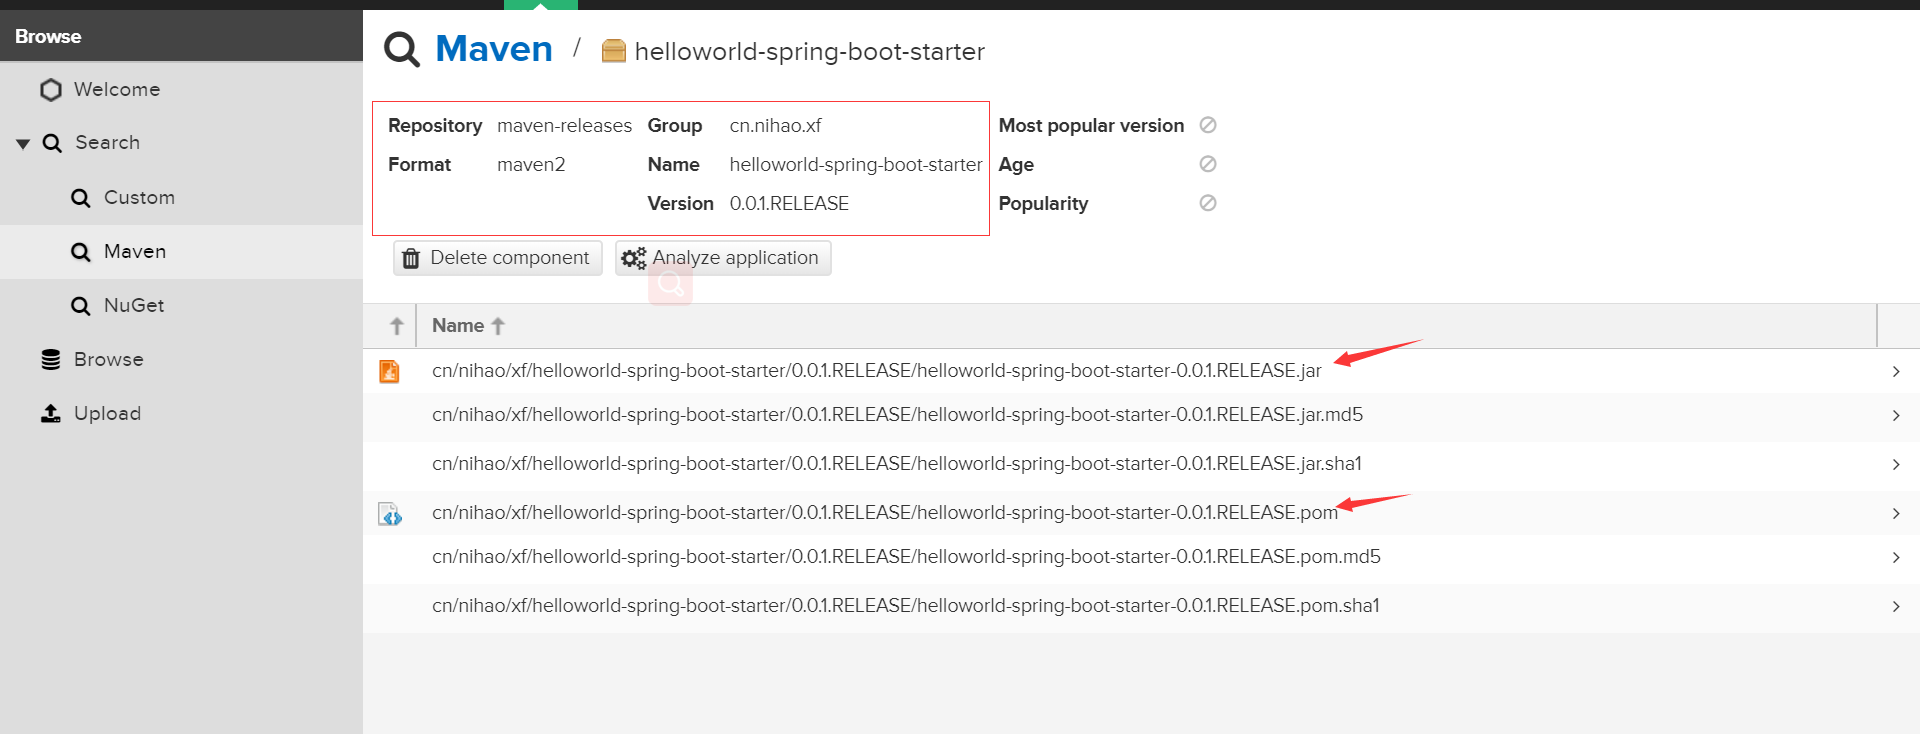
Linux搭建Nexus私服
Nexus是什么 Nexus是一个强大的Maven仓库管理器,它极大地简化了自己内部仓库的维护和外部仓库的访问。利用Nexus你可以只在一个地方就能够完全控制访问 和部署在你所维护仓库中的每个Artifact。Nexus是一套“开箱即用”的系统不需要数据库,它使用文件系统加Lucene来组织数据。简单来说,它就是我们自己维护管理的maven仓库,仅限本人或公司内部使用,他人...
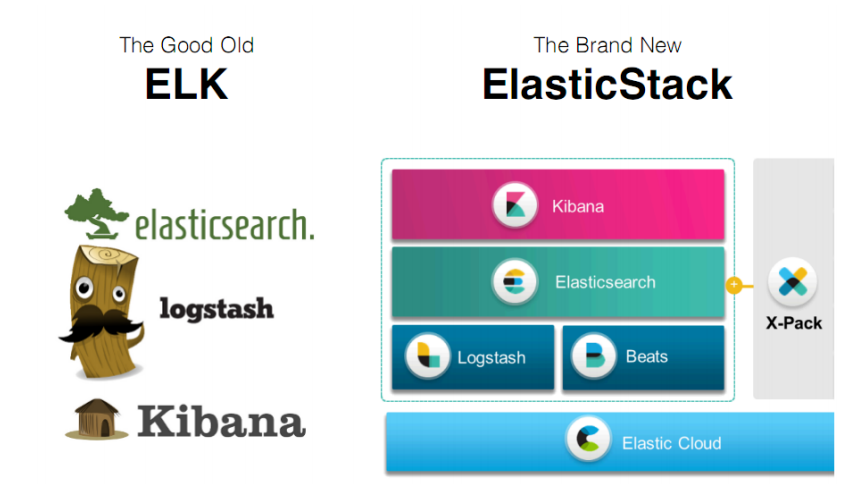
【Elastic Stack上】Elastic Search快速入门,让你对ELK日志架构不再困惑
课程介绍 Elastic Stack简介 Elasticsearch的介绍与安装 Elasticsearch的快速入门 Elasticsearch的核心讲解中文分词 全文搜索 Elasticsearch集群 Java客户端讲解 1、Elastic Stack简介 如果你没有听说过Elastic Stack,那你一定听说过ELK,实际上ELK是三款软件的简称,分别是Elasticsearch、Log...
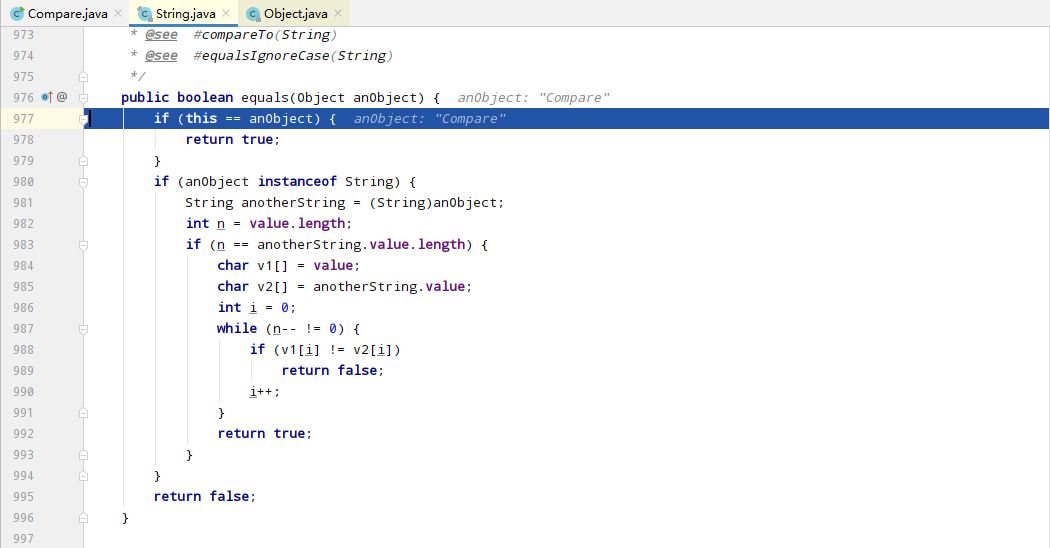
浅谈Java中==和equals()区别
Java基础 浅谈Java中==和equals()区别 == 运算符 equals(): 方法 浅谈Java中==和equals()区别 == 运算符 可以使用在基本数据类型变量和引用数据类型变量中 如果比较的是基本数据类型变量,比较两个变量保存的数据是否相等(不一定要类型相同) 如果比较的是引用类型变量,比较的是两个变量的地址值是否相同,即两个引用是否指向同一个对象实体 equals(): 方法...